Showing posts with label Weekly Survival Skills Challenge. Show all posts

Wednesday, September 9, 2015

Weekly Survival Challenge: Make/Buy & Test A Micro Kit To Keep on you 24/7

This weeks challenge is simple, make a micro kit to carry with you 24/7 and test that kit's contents to determine their effectiveness. This doesn't have to be an Altoids tin kit, it can be a survival bracelet, key chain, belt, wallet or whatever else you can think of just as long as you can effect short-term survival with your kit. Below if a video of my current Micro 10 C's kit (minus survival blanket and trapping/small game card) to give you a starting point for an altoids kit. I will go over the key chain and bracelet kits below.
If You Missed A Live Show Or Survival Challenge Be Sure To Catch Up On Them Here: 
Weekly Survival Challenge : Week 1- Knife Selection, Maintenance and Use (LINK-HERE); Week 2- Water Gathering and Purification (LINK-HERE); Week 3- Ferro Rod Skills (Link Here);Week 4- Twig Fire; Week 5- Making & Using Charred Material (LINK-HERE); Week 6- Cook A Meal Over A Fire (LINK-HERE); Week 9: Complete an Overnight Trip (LINK HERE);

Weekly Radio Show: What Does It Really Mean To Bugout w/ Jim Cobb (09/08/15- LINK HERE);Natural Medicine With Herbal Prepper (09/01/15- LINK HERE)Canning A Viable Means Of Increasing Self Sufficiency (8/11/15- LINK HERE); Law Enforcement's View On Preparedness (08/04/15- LINK HERE); Doing The Stuff of Self Reliance w/ Todd "The Survival Sherpa" Walker (07/28/15- LINK HERE); The quality of knives and outdoor gear w/ Indy Hammered Knives (7/14/15- LINK HERE)Obtaining Suitable Water (07/21/15- LINK HERE); First Live Show (07/07/15- LINK HERE)
 
Altoids/Micro 10 C's Kit
This is the kit I referenced in the video above and when all is said and done I can perform nearly any survival task required of me with this very small survival kit. Many if the items were grabbed from other smaller kits, taken from parts of my main kit or purchased with the specific purpose of going into this kit. While many commercial kits could be cheaper than the sum of the parts of this kit I have spent countless days over the last two years getting this kit setup the way I like and the components functioning as I like while being multifunctional. An alternative knife that could be used is the Minimalist by CRK (Click here to buy and for more information). I would like to find a means of getting the survival blanket into the actual tin but that would require the sacrifice of a lot of cordage that I prefer to keep in the kit. Aside from the lack of a blanket in the actual tin I would like to be able to find a true folding metal container that you can boil in aside from aluminum foil.
Survival Bracelet:
The survival bracelet is a little more limited in what it can carry on a daily basis but the Wazoo Mountaineer has just about everything you would need to survive minus a blade (Check out my 3 day  review trip here- LINK). The ReFactor Tactical survival bracelet adds on a p38 can opener to act as a knife and a few other functions that the mountaineer does not contain but does add a good bit of bulk to your wrist. I will be adding a review in the very new future of this survival bracelet. If you go with the DIY option I highly recommend adding a can opener, aluminum foil (in the core), ferro rod and scraper and some kind of tinder material to the bracelet.
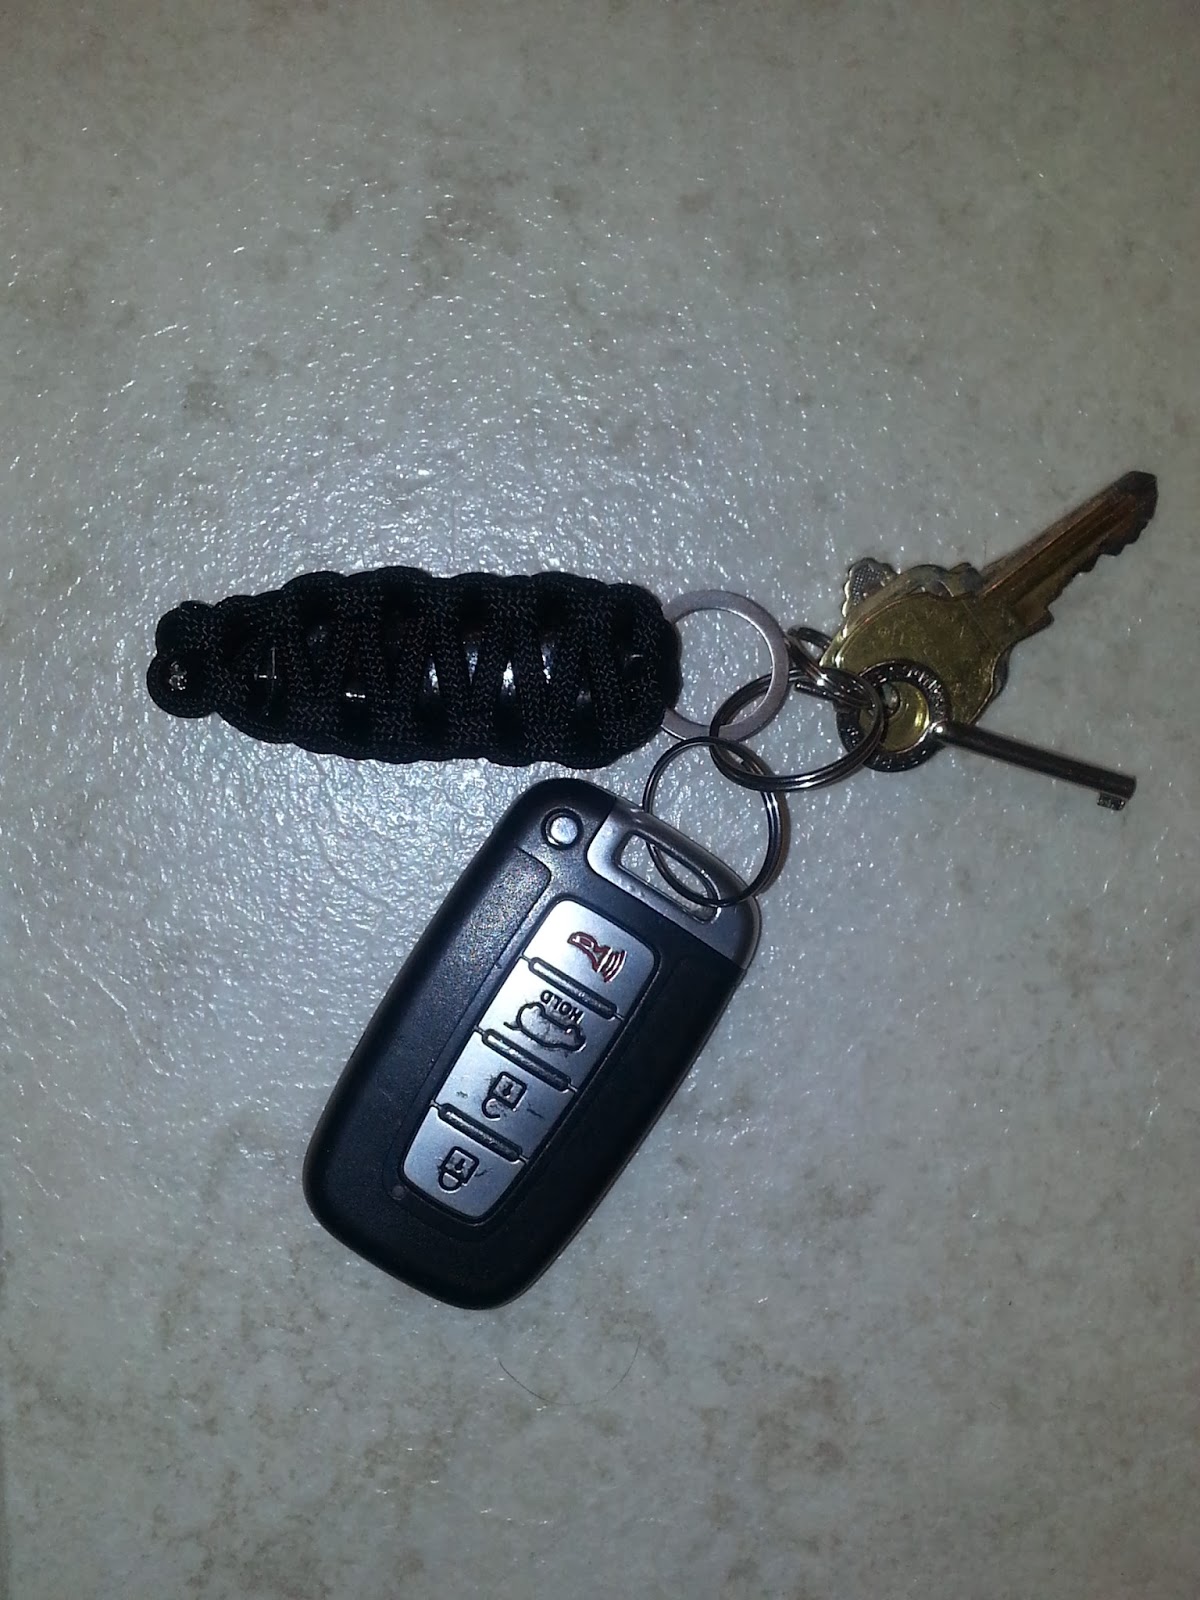
Key Chain Kit:
I have had this little key chain kit on my keys for a few years and haven't done much with it, but it is always there if I should require a knife, saw, ferro rod, cordage or tinder. If you make one yourself I highly recommend that you add a little aluminum foil to the kit to give you at least a very small container.

 Want To Buy A Kit Instead Of Making Your Own? Try One Of These:


Conclusions:
 The point of this challenge is to get some type of kit and keep it on your person 24/7. While I don't always carry my belt knife and full 10 C's Kit on my person (sometime you can't do that in the legal profession), I do always have a micro survival kit or three. I have done several week long tips with just these kit items over the last couple years and used them to effect my self reliance and the have effectively helped me survive at a functional level spring through fall. In all honesty if you are caught out in -20 degree temperatures with high winds and your are not lucky enough to find a pine grove for shelter your going to be in for a very long night without a larger kit. If you are going into the woods these should not be relied upon solely as your survival kit, they are meant as a last ditch type of kit where you lose your other gear or when you enter a survival situation when not in a woodland environment. So get out there and build then test out your kits to ensure you are prepared no matter what and share pictures or video of your adventure with us!

Visit Us On Social Media: 
Consulting Company Website: http://jpsconsulting.webs.com/

Have something outdoor/bushcraft/trapping/preparedness/hiking/camping/fishing/hunting related you want me to make a post about? Leave me a comment and I will see what I can do! As always feel free to leave your questions and comment below! Also if you enjoy the blog please vote for us on the following websites to help us reach a wider audience:
 
You are only able to vote once DAILY using this site! Currently we are just outside the top 20 on this site.  
AND
  You are able to vote DAILY on this site! We are currently ranked # 2 on this

Tuesday, August 18, 2015

Weekly Survival Challenge: Overnight Trip

This week's survival skills challenge is as simple or as difficult as you would like it to be. The premise is to gather whatever survival/self reliance gear you have into a kit, if you have a BOB, GO Bag, Hunting Pack, EDC Bag (See mine HERE- LINK), etc. even better, and take that kit out into the woods for a 24 hour trip. The kit can be as big or small as you would like. If you would like to take the challenge to an extreme you can just take a your EDC (highly recommend you have a survival bracelet and and a fixed blade knife- See my series doing this same challenge HERE- LINK) at a minimum or if you have a micro kit (See My Micro 10 C's Kit Here- LINK) this would be an excellent opportunity to test out how well it will help you in a wilderness environment. The purpose of the challenge is to test not only the gear in your kit to determine its effectiveness and potential issues but also to test out a few skills while you are out to determine where you may need to focus your future practice. Check out the video Below as I go into a little more detail about the challenge and what I hope you get from it.


If You Missed A Live Show Or Survival Challenge Be Sure To Catch Up On Them Here: 
Weekly Survival Challenge
: Week 1- Knife Selection, Maintenance and Use (LINK-HERE); Week 2- Water Gathering and Purification (LINK-HERE); Week 3- Ferro Rod Skills (Link Here);Week 4- Twig Fire; Week 5- Making & Using Charred Material (LINK-HERE); Week 6- Cook A Meal Over A Fire (LINK-HERE).
Weekly Radio Show :Canning A Viable Means Of Increasing Self Sufficiency (8/11/15- LINK HERE); Law Enforcement's View On Preparedness (08/04/15- LINK HERE); Doing The Stuff of Self Reliance w/ Todd "The Survival Sherpa" Walker (07/28/15- LINK HERE); The quality of knives and outdoor gear w/ Indy Hammered Knives (7/14/15- LINK HERE)Obtaining Suitable Water (07/21/15- LINK HERE); First Live Show (07/07/15- LINK HERE);


Need A Ready Made Kit To Test? Try One Of These:
   
 
 Conclusions:
This challenge is one I take on weekly, as I like to consistently test and retest my gear to determine it's effectiveness for long-term self reliance. I hope you are able to find what the gaps in your supplies may be for summer (we will do one of these at least each season) and what skills you can stand to work on. My favorite spring/summer skills to practice while out are fishing, wild edible collection and as always fire craft so feel free to work on those skills.

Visit Me On Social Media:
Consulting Company Website: http://jpsconsulting.webs.com/
Have something outdoor/bushcraft/trapping/preparedness/hiking/camping/fishing/hunting related you want me to make a post about? Leave me a comment and I will see what I can do! As always feel free to leave your questions and comment below! Also if you enjoy the blog please vote for us on the following websites to help us reach a wider audience:
 
You are only able to vote once DAILY using this site! Currently we are just outside the top 20 on this site.  
AND
You are able to vote DAILY on this site! We are currently ranked # 2 on this

Tuesday, August 11, 2015

Weekly Survival Challenge: Cook A Meal Over a Camp Fire

This is one of my favorite things to do in the woods! There is something food cooked over an open camp fire that just makes everything taste better (flame licked and smoke infused would be the thing) and on top of that eating your meal in the woods seems to make it taste better as well. I don't know if its the fact that you had to work a little harder for that meal, the setting, the ambiance of a camp fire or just that the food really does taste that much better. Even a simple fish stew and wild edibles seems to taste decent. So what is the challenge? Simply put, make a full meal over a camp fire and have it all finish as close to the same time as possible. If you want to make this a little more challenging hunt/fish/trap/forage (just be sure to follow local laws) for your meal and prepare it. Below I run you through a few of my favorite meal options for the woods that I have done articles or video on (for some reason I forget to take pictures and video when cooking a good bit). Feel free to make whatever you want to eat, but please make sure it has meat (or meat substitute if you don't eat meat), starch, vegetables and bread or a dessert (last two choices can be finished before or after meal if you so desire). Below are a few things to get you thinking about your menu and how you would like to prepare your meal.

Be Sure to Check Out My Older Outdoor Cooking Posts:
Other Outdoor Cooking Posts: Pioneer Pumpkin Pie; Teays Valley Corn Bread; Shore Lunch Cheddar Potato Soup Vs. Bear Creek Cheddar Potato Soup; Betty Crocker Blueberry Muffins; Bear Creek- "Darn Good" Chilli; Low Country Boil; Mountain Man Stew; Bear Creek Gumbo; Idahoan Hash Browns; Preparing Trout- Recipes to Try; Wild Edible- Wild Onions; Wild Edibles- Leeks (A.K.A. Ramps); Wild Edibles- Winter Collection; Martha White Chocolate Chip Muffins; Catfish Pond to Plate; CrawFish.

Outdoor Cooking Tool Posts: Improvised Container; Trangia Mess Tin; Rotating/Adjustable Pot Hanger; Stripping and Re-Seasoning Cast Iron; Baking Over A Camp Fire; Cheap Bomb Proof Bush Pot; Modified Primitive Pot Hanger; Series Introduction; Pathfinder Bottle Cook Set Review; DIY Hobo Stove

Hunters Stew:
This is without a doubt the easiest means by which to fulfill all the ingredient requirements aside from beef stew and in my opinion one of the best meals you can make in the woods. The ingredient list is simple: 1/2lb of meat (your choice but 70/30 beef seems to work best for me as the grease makes everything taste a little better), 2-3 potatoes diced, 1/3 bag of baby carrots or 2-3 diced carrots, 1/4 onion diced or pick up about a dozen wild onions. Some people add a little butter but when in the woods I usually just add a little olive oil to the bottom of the aluminum foil. Season to taste pepper, McCormicks grill mates and a little hot sauce seem to work great for me! Here is the full article where I walk you through the process step-by-step (LINK).

Wild Edible Stew and Fish:
This meal was prepared while on an outing with just a survival bracelet, belt knife, shot gun and a turkey call (spring gobbler season) so I didn't bring anything with me to eat but was still able to meat the requirements. If you plan to do the same thing then also feel free to skip the starch and dessert. You could make a little pine bark bacon as your starch but I had that early the next morning and you can only eat so much bark and pretend its bacon! See the entire article HERE: LINK.

Beans, Hotdogs, Kielbasi/Crout and Smores:
This is my normal fourth of July camp out meal and man does it taste amazing over a fire. The flame kissed crout and kielbasi in a skillet after they are done cooking are out of this world! This picture shows my old grate setup I used to carry in my pack, it was essentially an old grill grate and allowed me to cook a ton of food all at once when suspended from a tripod.

Trout and Low Country Broil:
This stuff is for those who are going glamping or at least glamping your first night. A seafood boil is one of my favorite meals and unfortunately living in WV the only native ingredient I can ever look for is Craw fish (See my article on preparing crawfish HERE). This meal included the two trout that were caught earlier that day as well as all of the perishables that we brought in specifically for that nights big dinner with the people who could only stay that night and part of the next day. If you would like to learn how to make a Low Country broil check out my instructions here (LINK)... this meal also meets all of your requirements for a meal in the woods and is a great meal to prepare when having a group of friends over!

Varmint on A Stick:
Squirrel and rabbit season are fast approaching here in WV and one of my favorite things to make is critter on a stick! Boil a red squirrel for a little while and take the meat that falls off for gravy with a little corn starch and flower for breakfast or flame roast it like pictured below for dinner. Add vegetables and a starch to this and the meal will meet the requirements, or if you are going for an all natural woods to plate meal add a little cattail, onion, dandelion, pine bark, plantain, berries, or whatever is edible in your area and make up a full meal.

HOBO Bread:
If you are like me bread (more specifically muffins or bannock) is a staple of your breakfast in the woods. My cook set has included that internal can for years now in my bottle bag and one night I found that it made the perfect convection oven for my Trangia frying pan (Here are instruction on how to bake bread with this method- LINK). When I made that revelation my breakfast outlook changed completely! Just add water muffin mixes are the perfect fit for this container and make a hearty breakfast for two or a good late night snack for a group on a cold winter camp.

Need A Way To Catch and Cook Food? Try These Products:

If You Missed A Live Show Or Survival Challenge Be Sure To Catch Up On Them Here: 
Weekly Survival Challenge
: Week 1- Knife Selection, Maintenance and Use (LINK-HERE); Week 2- Water Gathering and Purification (LINK-HERE); Week 3- Ferro Rod Skills (Link Here);Week 4- Twig Fire; Week 5- Making & Using Charred Material (LINK-HERE);

Weekly Radio Show :Canning A Viable Means Of Increasing Self Sufficiency (8/11/15- LINK HERE); Law Enforcement's View On Preparedness (08/04/15- LINK HERE); Doing The Stuff of Self Reliance w/ Todd "The Survival Sherpa" Walker (07/28/15- LINK HERE); The quality of knives and outdoor gear w/ Indy Hammered Knives (7/14/15- LINK HERE)Obtaining Suitable Water (07/21/15- LINK HERE); First Live Show (07/07/15- LINK HERE);
Conclusions
 This week's challenge is on the easier side, but is one of my favorite skills to practice while out in the woods. Meal planning for a long trip, stretching food to last longer than it should, preserving food, hunting/fishing/trapping/gathering food, correct preparation are all long-term self reliance skills that everyone can easily learn by practicing. Weather you are here as a camper, outdoors enthusiast, backpacker, emergency responder, bushcrafter, woodcrafter, prepper, etc. one thing is universal, once you make that first meal in the woods you will be hooked! Nothing like taking a deer steak from the source and throwing it over the deer camp fire and sharing hunting stories with friends. While you make have to go on an extremely minimalist camp to make this a challenge I do urge you to enjoy yourself on this challenge, test your cook set and maybe think of an outside the box purpose for one of the items in your it or laying around your house. Make this a fun learning experience (maybe take a child, niece/nephew, boy/girl scouts along and pass on the skills) and I guarantee that you will not be able to wait for your next outing!

Visit Me On Social Media:
Consulting Company Website: http://jpsconsulting.webs.com/

Have something outdoor/bushcraft/trapping/preparedness/hiking/camping/fishing/hunting related you want me to make a post about? Leave me a comment and I will see what I can do! As always feel free to leave your questions and comment below! Also if you enjoy the blog please vote for us on the following websites to help us reach a wider audience:
 
You are only able to vote once DAILY using this site! Currently we are just outside the top 20 on this site.  
AND
You are able to vote DAILY on this site! We are currently ranked # 2 on this

Wednesday, August 5, 2015

Weekly Survival Skills Challenge:Making and Using Charred Material

This weeks survival challenges remains in the vein of fire craft and is quite simple, make some kind of charred material and make a fire with it. Now before you say, oh that's too easy (or its fire season please comply with the fire code this whole challenge can be done over a grill if you are out west) let me through this out there, this challenge series isn't about having you do something you haven't done its about getting out there and practicing. So with that in mind if char cloth is too easy then make char cloth without a metal container, if that is too easy char natural materials, if that is too easy char the first five things you come across in the woods (some may work, you never know until you try), if that is too easy char natural materials without a container.

If You Missed A Live Show Or Survival Challenge Be Sure To Catch Up On Them Here: 
Weekly Survival Challenge: Week 1- Knife Selection, Maintenance and Use (LINK-HERE); Week 2- Water Gathering and Purification (LINK-HERE); Week 3- Ferro Rod Skills (Link Here);Week 4- Twig Fire; 
Weekly Radio Show: Doing The Stuff of Self Reliance w/ Todd "The Survival Sherpa" Walker (07/28/15- LINK HERE); The quality of knives and outdoor gear w/ Indy Hammered Knives (7/14/15- LINK HERE)Obtaining Suitable Water (07/21/15- LINK HERE); First Live Show (07/07/15- LINK HERE);
Making Char Cloth:
So where do we start and what will you need? If you're new to this traditional fire starting method start with some 100% cotton swatches (old undershirts or blue jeans work best for me), in addition to the cotton material you will need a metal container (I like to use Altoids tins or old cookie tins for natural materials) and a fire source (grill, alcohol stove, camp fire, etc.). Here is my tutorial for making Char Cloth: http://priorproperplanningpppp.blogspot.com/2014/06/preparing-for-next-fire-car-cloth.html. So for those of you new to char based fire I highly recommend you use this method, please feel free to use a grill or camp stove to make the char cloth if there are fire restrictions in your area. Below I will show you a few means for obtaining fire utilizing this charred material.

Natural Char Material:
This is one of my favorite things to while in the woods for a long-term outing. Weather you're using a ferro rod or some other traditional fire making method having charred material will allow you to use marginal tinder bundles and can reduce the wear and tear on your ferro rod (you will only need one scrap vs. multiple). I have experimented with several materials but generally anything that will work in a tinder bundle (highly fibrous materials) will work as char. I find that this is about the only way I use cattail as it is much easier to control as it moves from a flash tinder to a much easier mean of effecting a fire. Technically char can be made of any natural carbon life form but I have had limited success with barks and other materials. If this is your first time charring natural materials use inner barks or cattail for best success and stick to one type of material to char as natural materials very greatly in the amount of time they take to char. If you want a little more information on charring natural material aside from the video above please feel free to check out my tutorial: http://priorproperplanningpppp.blogspot.com/2015/05/making-char-from-natural-materials-and.html

Magnification + Charred Materials = Fire:
The great thing about charred material as you can see is that you can use much more sustainable methods for fire starting, thus increasing the amount of time you will be able to save your kit (ferro rods, lighters, matches, etc. for emergencies). I'm a sucker for these traditional methods of fire making and often find myself pulling them out of my kit. The lens in the video above is small enough to keep in your wallet and will make a fire easily with just a few seconds of sun. So for this fire starting method just add the charred material to a tinder bundle (marginal should be fine as long as it is highly fibrous), then position the lens so that there is a small single point of light in the center of the charred material. Once you see a red ember simply blow that ember into flame (this may take awhile if the material is very marginal) you then flip the tinder bundle over on it's self and add to your fire lay. Here is the full article using the lens in the video above: http://priorproperplanningpppp.blogspot.com/2014/10/survival-resources-4x-fresnel-magnifier.html
If you are planning on adding a larger lens to your kit check out this tutorial using one: http://priorproperplanningpppp.blogspot.com/2014/06/solar-ignition-fire.html

Flint & Steel Fire Starting:
Now my favorite method for fire starting method- good old flint and steel. This can be done with a high carbon steel blade, old tools and a variety of dedicated strikers. Simply pick up a hard rock and start hitting it off the steel (watch the video for the method- this should yield a decent amount of sparks) if you don't get sparks from the method you need a harder rock or a higher carbon steel. I keep some flint in each part of my kit, in my micro 10 C's kit I have a knife/striker combo, my large kit has a "C" striker in it and all of my belt knives are high carbon steel. If you haven't tried this method you will either love it or hate it, but either way you should learn and master the skill. Take a look at this tutorial for a little more information: http://priorproperplanningpppp.blogspot.com/2014/12/traditional-flintsteel-fire-starting.html

Need To Build Your Primitive Fire Skills:

Conclusions:
This week's survival skill challenge is to take advantage of charred material to extend the life of your fire kit for long-term self reliance. Remember this challenge is what you make of it, you can make it as easy or as hard as you choose. If your an expert start with charring natural materials without a metal container, if you're new to this fire making method start with char cloth. So get out there, practice your skills and keep improving your self reliance skills!
Be sure to join us each Tuesday night at 9pm Eastern Time on American Preppers Network's: Prepper Broadcasting Network for the 7 P's Survival Radio Show (http://prepperbroadcasting.com/the-7-ps-of-survival/). If you have a suggestion for a show topic or know someone who would like to be a guest then please feel free to contact me by email (joshsemailfilter-7psblog@yahoo.com). 

Visit Me On Social Media:

Consulting Company Website: http://jpsconsulting.webs.com/

Have something outdoor/bushcraft/trapping/preparedness/hiking/camping/fishing/hunting related you want me to make a post about? Leave me a comment and I will see what I can do! As always feel free to leave your questions and comment below! Also if you enjoy the blog please vote for us on the following websites to help us reach a wider audience:

 
You are only able to vote once DAILY using this site! Currently we are just outside the top 20 on this site.  
AND
You are able to vote DAILY on this site! We are currently ranked # 2 on this

Tuesday, July 28, 2015

Weekly Survival Skills Challenge: Twig Based Fires


This week's survival challenge is simple, make a sustainable fire (chest high flame with material as thick as your wrist on fire) with twigs and sticks you pick up from the ground or dead standing. This is the type of fire I create 90% of the time when out in the woods and it works well for me for cooking and short-term heating (add larger logs for a long-term fire). I have included several past YouTube videos below to help you through the challenge and also the links below can serve as good reference material if you are having any issues (Also please don't hesitate to ask any questions you may have in the comments below).

So advice for this challenge: 1) Tinder- Don't use a flash tinder get something that will give you an intense flame for at least  two minutes if this is your first attempt at this type of fire (i.e. one of my Fire Pads, Large tinder bundle of tulip poplar, baseball hat full of dry shavings, baseball bundle of dryer lint, etc.); 2) MORE SMALLS. If you don't have two fists full of small twigs (think pencil led) then go get more (if you material is wet no less than 4 fists full). Quadruple that amount of prep for pencil size twigs and have at least a bushel  (make a pile on the ground and pick it up and hug it against your chest) of twigs between thumb and wrist size; 3) Chaos is king, don't try to make it look perfect, just let it have plenty of oxygen (use your hat to fan it if it looks like its beginning to fade); 4) once you have a decent flame from each level of sticks you can then start to add the next type; 5) If this is going to be your warming fire then get 10x the amount of wood you think you will need (See my fire prep for an all night twig based fire HERE-LINK); 6) If you don't succeed the first time think about adding more tinder material or getting better tinder material and get MORE SMALLS. If you can't get a huge bundle of pencil led twigs to ignite with a decent tinder bundle film it, email me and I will Skype with you to help trouble shoot.

Need Additional Help Getting Your Fire Started? Try a few of these methodsDryer Lint Tinder Bundle  (LINK); Gorilla Tape Tinder Bundle (LINK); Rub Cloth (LINK); Dragon Ball Fire Starters (LINK); Char Cloth (LINK); Solar Ignition (LINK); One Stick Fire (LINK); Fire Pad (LINK); DIY Fire Starter: Cotton & Petroleum Jelly Modification  (LINK); Camp Fire vs. Survival Fire vs. Cooking Fire (LINK); Building a Sustainable Fire In Wet Conditions (LINK); Split Match Trick (LINK); Survival Resources 4x Fresnel Magnifier (LINK); Fatwood Fire (LINK); Evolution of My Pocket Fire Kit (LINK); Split Wood Fires: Using Your Knife As A Spokeshave (LINK); Cattail Fluff Used as Flash Tinder (LINK); Wetfire Tinder (LINK); Twig Bundle Fire (LINK);What I like to Use For Tinder Bundle Materials (LINK); Fritos Tinder Bundle (LINK); Splitwood Log Cabin Fire (LINK); Splitwood Tepee Fire Lay (LINK)

Sustainable Wet Twig Fire Using Dryer Lint For Tinder: 
This is one fire tinder everyone has laying around the house for the most part so i decided to do this sustainable fire using the simplest of tinder bundles just plain old dryer lint (See Full Article about this fire HERE- LINK. This fire method can be done with nearly any type of tinder bundle (avoid flash tinder such as jute twine and cattail), just be sure there is enough material/flame time to not only dry your smalls but also bring them up to combustion temperature.

Using Wet Fire Tinder To Light Wet Twigs:  
This is essentially the same method as above just demonstrating a different type of tinder material, WetFire (Buy Them Here- LINK). If you are having trouble with natural tinder or DIY tinder go grab some of these using that link above and you shouldn't have any problem effecting fire even in wet conditions. Just remember to have a brace to place your tinder on (i.e. bark from a log) and don't light the entire cube, make shavings it will improve your odds!
 

Low On Tinder Materials or Ferro Rods? Try These:
 

Modified Twig Bundle Fire w/ Softwoods & Dry Grass Tinder:  
This is my favorite means of making a twig based fire! If I'm moving my camp I will without a doubt make one of these twig bundles (if raining I will make two separate bundles then add tinder materials in-between and secure together) prior to leaving my first camp so that once I get to my second camp I can have a sustainable fire just one ferro rod strike away! So what are some lessons I have learned since making this video? 1) More tinder material in between the bundles= big fire fast; 2) If I keep the tinder in my leather belt dump pouch these fire lays will still go up like wild fire even when wet; 3) make several of these bundles to fill the air space under a raised bed and it will help keep you warm in two ways; 4) If you are trying to rapidly rewarm be sure to lean it against a dead log and your fire will easily be the same height as you are; 5) use bank line to secure this fire lay it will stay together muck longer; 6) tie the two bundles together 3/4 of the way up so you have a little air flow, yet it will still stay together after flame for a few minutes; 7) Collect your larger wood and add them to the fire as soon as the bundle breaks apart; and 8) You may need a stick to move all of the fire material post breaking apart back into your fire area.  Read the full article about this twig bundle for more information HERE- LINK.
Wet Hardwood Twig Bundle:
While this twig bundle will not burn with the intensity of the softwood bundle, it is still a very effective fire lay and has worked quite well for me in the eastern woodlands where nearly all the trees around me are hardwoods. I usually collect the bundles as I walk from camp to camp or out on scouts, you can simply put them under your arm or tie a shemagh as an arm sling and keep it in front of you to hold the bundle. With this bundle (especially when wet) you will often need much more tinder material to get a sustainable fire so keep that in the back of your mind. Read the full article about this twig bundle for more information HERE- LINK.

If You Missed Our Last Few Shows Or Survival Challenges Be Sure To Catch Up On Them Here:
Weekly Survival Challenge: Week 1- Knife Selection, Maintenance and Use (LINK-HERE); Week 2- Water Gathering and Purification (LINK-HERE); Week 3- Ferro Rod Skills (Link Here);
Weekly Radio Show: The quality of knives and outdoor gear w/ Indy Hammered Knives (7/14- LINK HERE)Obtaining Suitable Water (07/21- LINK HERE); First Live Show (07/07- LINK HERE);

Conclusions:
This week's survival skill challenge is to take advantage of all those twigs laying on the ground around you. I prefer twig based fires as they are fast and take less time to build than a split wood fire, but they also come with the drawback of being harder to maintain, are smokier and often harder to light. I like these as it means less tress to chop down, not wasting resources that are there for the picking and if practices can not only be efficient but can become one of your favorite means of making fire. So get out there, pick up some sticks and bring out your inner Mountain Man by making a fire.

Be sure to join us each Tuesday night at 9pm Eastern Time on American Preppers Network's: Prepper Broadcasting Network for the 7 P's Survival Radio Show (http://prepperbroadcasting.com/the-7-ps-of-survival/). If you have a suggestion for a show topic or know someone who would like to be a guest then please feel free to contact me by email (joshsemailfilter-7psblog@yahoo.com). 

Visit Me On Social Media: 

Consulting Company Website: http://jpsconsulting.webs.com/
 

Have something outdoor/bushcraft/trapping/preparedness/hiking/camping/fishing/hunting related you want me to make a post about? Leave me a comment and I will see what I can do! As always feel free to leave your questions and comment below! Also if you enjoy the blog please vote for us on the following websites to help us reach a wider audience:

 
You are only able to vote once DAILY using this site! Currently we are just outside the top 20 on this site.  
AND
You are able to vote DAILY on this site! We are currently ranked # 2 on this