This Page is dedicated to all things Bushcraft, Woodcraft, Wild Edibles, Preparedness, Hunting/Shooting, Survival, Camping, Primitive Living, Homesteading, Gear Reviews, Kit Mentality, Outdoor Cooking and anything related to the Outdoors! Come learn together and share your experiences as we take this preparedness journey together.
Tomorrow, Tuesday March 29, 2016 I will have Jim Cobb on my radio show over at (http://prepperbroadcasting.com/live-shows/the-7-ps-of-survival/) talking about his new book the Prepper's Communication Handbook. We will be working our way through the book on the show giving you all kinds of insights on pre and post disaster communication and communication systems. You can pick up a copy of his book below.... Now what does this have to do with my blog aside from the fact he is on my radio show tomorrow? Well, this past week Jim Cobb over at SurvivalWeekly.com posted his annual
video/essay contest to coincide with the release of his newest book
"Prepper's Communication Handbook" (Buy it Here- LINK).
The rules for the contest this year were pretty simple: 1) Provide
original content (either video or essay) about some topic concerning
preparedness or self-reliance - one of the suggested video topics was
pack setup so I talked about my haversack in the video below; 2) Upload
and email to Jim Cobb; 3) Be family friendly. The entrees are then
posted on survivalweekly.com where they will be judged by several
professional in the industry as well as selecting a fan favorite. The
three winners (fan favorite/video/essay) will receive a prize package with a multi-band radio, his new book, a UV pen, UV light and a few assorted training DVD's. You can learn more about the contest here: LINK. If you would like to see the rest of the entrants you can find those here (LINK).
So here is my updated woods haversack for the summer when in predator country. This kit can essentially suffice for long-term self reliance (sure a few traps and a few other things would be nice but I could easily be comfortable long-term out of this kit). There are several additions to this kit from when I explored it as my 10 C's kit for the Pathfinder School's Phase 1 Course. The video is a bit long as I talk about every item in the kit including my Micro 10 C's Kit (Find more information Here- LINK) and my current fire kit. The weight isn't too bad at all but you will know its on your shoulder after a few hours with a full water bottle and a box of spare 44 Magnum ammunition.
I forgot to add my ultralight fishing kit to the video as it was in my larger tackle box for a boat based trip earlier in the week. While this kit is not always in my haversack, it usually finds a home there whenever I will be near a fishable body of water. I know it is overkill and you can easily catch fish with a piece of cordage and a makeshift hook but a crank bait makes life the fishing process a little more fun.
Check Out These Other Books By Jim Cobb:
Conclusions:
I love carrying my Pathfinder School Oil Skin Haversack whenever I'm in the woods as it is one of the more minimalist means of carrying everything I might need and still provide extra room for foraging, fire material, etc. This kit incorporates survival necessities, self/predator defense, sustainability and much more all in a lightweight (the haversack literally folds down to the size of an Altoids tin and weighs less than my micro 10 C's Kit) and adaptable package. I have been debating for awhile going back to a mid-sized backpack and utilize it for every trip long or small where as the haversack is broken down and placed into my pack on longer trips. For now the haversack kit will be by my side whenever I venture out but as always I'm always looking to improve!
This past week the Wilderness Trade Blanket Facebook Group (Find It Here- LINK) hosted a challenge to get the fastest time for a primitive fire and setup a tarp shelter. The challenge was sponsored by Deer Creek Wilderness Outfitters (find there here- LINK) who offered up one of their new knives ($300.00+ value) as the first prize. The requirements of the challenge are as follows: 1) One tarp with ridge line; 2) Secured with four stakes; 3) Start fire with primitive source (flint/steel, magnification or friction method); 4) Tinder bundle prepared on camera; 5) Fire material can be processed and separated; 6) Fire lay much be built on camera; 7) Say start and stop; 8) Sustainable fire (they defined by roughly 1' flames); 9) Fastest time wins; 10) Post video to group page and tag group admin.
While I personally don't utilize a ridge line any longer unless hammock camping it's like riding a bike and essentially just requires the following: a figure 8 knot on one end (make the loop over sized to easily pass the working end through), then slip the rope through a grommet and place a toggle in the loop (2x or however many you desire to do so), then tie a butterfly knot 3' of more from the second tree, pass the rope around the tree and loop the rope through the butterfly using it as a makeshift 2-1 and finish the system off with a truckers hitch for easy take down.
If I were going to do a true fire/shelter/water type of challenge to get the best possible time I would more than likely do the following: 1) Place a Modified Twig bundle fire (Learn how to build one here- LINK) against a log and light with a ferro rod or lighter; 2) Place my water bottle on top of the log at the center of the bundle; 3) Setup modified Diamond Tarp Shelter (Learn how to set it up here- LINK). Once the shelter is setup the water should be nearing its boiling point (depending on the ambient temperature and water temperature) and this time can be utilized to add larger fuel to your twig bundle and setup your bed roll. Assuming minimal negative variables and above 0F degree temperatures this entire process can usually be completed in close five minutes; whereas, the fire/shelter video took close to five minutes. Why can my preferred setup shave off so much time? The pre-made tinder/fire lay saves a ton of time and goes up like a roman candle and cooks like a flame thrower when you put the cooking vessel at the top of the fire lay and lighting the fire first gives me an extra two minutes or so to reach a boil while setting up the tarp. The modified diamond tarp shelter saves a ton of time and stays much warmer than other tarp setups.
So without further delay here is my entry into the contest at a little under the Five minute mark for sustainable fire and shelter. Just click the picture below to start the video player.
Need Some Supplies To Get Started On Your Fire/Shelter Path? Try Some Of These:
Have something
outdoor/bushcraft/trapping/preparedness/hiking/camping/fishing/hunting
related you want me to make a post about? Leave me a comment and I will
see what I can do! As always feel free to leave your questions and
comment below! Also if you enjoy the blog please vote for us on the
following websites to help us reach a wider audience:
This past week I received a Boreal Mountain Wool Anorak and a Boreal Mountain Canvas Anorak and I wanted to take a little time to compare their anoraks to the Lester River Bushcraft/Empire Canvas Works Anorak I have been using for a little over a year. This article obviously isn't going to be based on long-term durability or performance it will center on value, features, quality and baseline impressions. I wore the canvas and the wool anorak each for a few hours before we filmed this video so I would have an idea of the performance but I haven't spend 50+ nights in it like I have the Lester River Bushcraft Anorak. I know the video and article below are a little long, but I hope you find them worth the time if you are in the market for a new Anorak. Just click on the image below to start the video where we compare all four anoraks.
Want To Try Amazon For You Anorak Needs? Try these:
Boreal Mountain Wool Anorak:
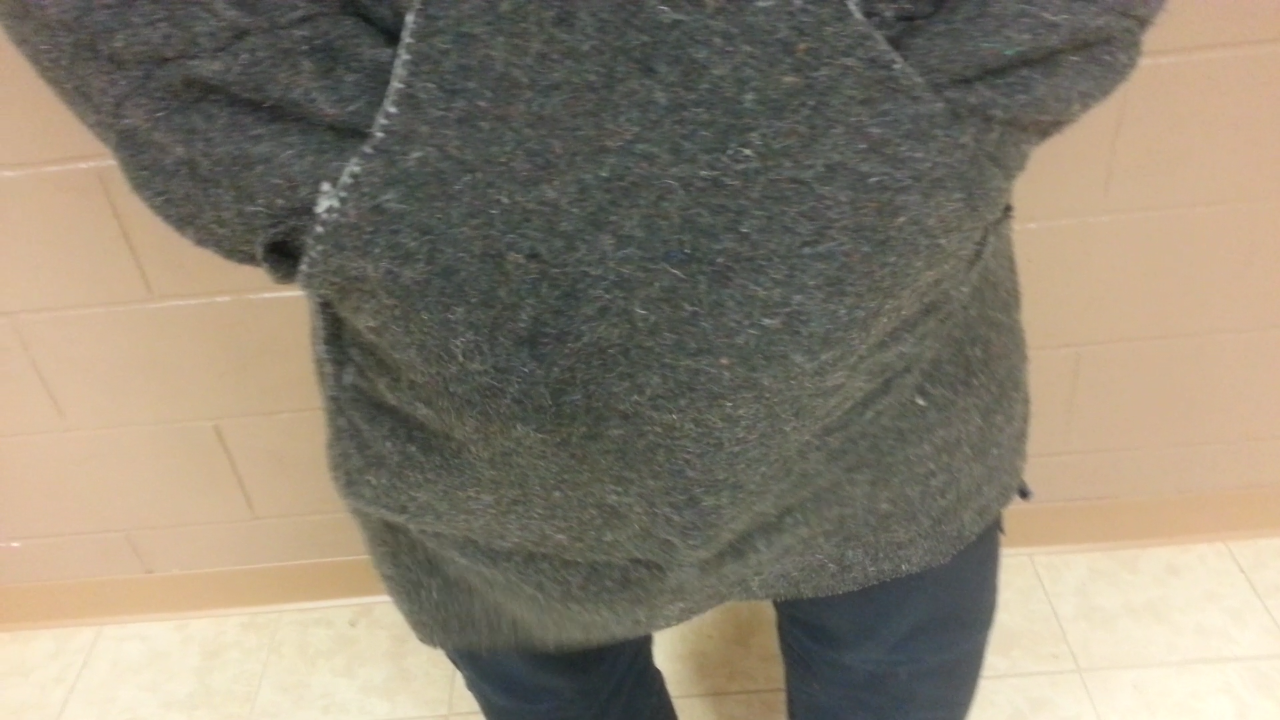
Feel: Aside from the Woolrich merino wool sweater in the video this anorak is without a doubt the softest and most comfortable against the skin. The wool is soft to the touch, doesn't cause any itching and wears well. The anorak is cut a little tighter than the Lester River so for layering purposes I would say go up a size as you can fit a t-shirt and maybe a sweater (the Woolrich sweater is a little tight under the anorak but still doable).
Functionality: I messed up and didn't realize that pockets were an option you needed to add to the anorak and I'm a big time pocket person. So I need to somehow get the front pockets on both of their anoraks before I get too deep into testing them so I give them a 100% fair shake. When wearing an anorak you lose access to your pockets and belt (unless you wear a bushcraft belt which I cant bring myself to do), so I view that front pocket as critical for carrying those items that would normally be in my pockets.
Weave & Stitching: In the video when I do the flashlight test you can see how tight the wind is on this garment. It did a good job of stopping the wind when outside (5-10 mph against my back) and after about 30 minutes I began to feel the entire back of the garment get cold. Now mind you I was just wearing a cool gear shirt under the Anorak. This anorak is by far the tightest weave on the table, only the Woolrich sweater is close in tightness of weave. Both the Lester River Bushcraft Anorak and the DIY Anorak require an outer layer above 5 mph winds or so as the wind just cuts right through the garment in my experience. As for stitching the anorak comes in second to the Lester River Bushcraft annorak as they have roughly double the stitches for the same area. That doesn't mean this anorak will not last as long (haven't done my long-term testing yet), it simply means there are less stitches over all. It does have twice as many or more stitches in each area as the DIY anorak, which has now been in heavy use (Jeremy uses it as his primary anorak fall-spring) for over a year without any issues or failure.
Cost: At rough cost $180.00 USD (the USD is declining vs the Canadian Dollar as it was $163 whenever I shot the video last week) depending on exchange rates (costs $250.00 Canadian Dollars) this anorak is one of the most affordable on the market today. Aside from making your own anorak from a wool blanket the only competitors who have cheaper anoraks or equivalent wool garment are military surplus dealers (heavy duty wool coats) or G Fred Asbell who offers a pathfinder anorak at roughly $100.00 USD. If you go with one of these options you will not have the neck and face protection offered by a traditional anorak but it will be just as heavy of weight garment. If you have plans to make your own (Learn how here: LINK) it will most likely be a much lower price if you can find a surplus blanket at a thrift shop to use; however if you plan to use a queen sized 100% merino wool blanket be prepared to spend somewhere close to $200.00 USD on just the blanket.
Extras: This anorak comes with decorative beads and a little more fashionable design and modern color scheme. The wool material is also one of the softest wool products I own, with only Woolrich clothing feeling softer. The rapid availability of the product is also a large plus if you need an anorak for an outing ASAP as you simply can't get many of the other anoraks for months. If you plan to make your own (stitching by hand) be sure to leave a good 8 hours to put the garment together if you're not an expert when it comes to sewing... i.e. if you're like me and the only thing you have sewn is in middle school home economics classes, a few field stitches and maybe a few field repairs using bank line.
Warmth: I was really supersized by how warm I stayed in this anorak. I really thought Lester River would be the run away winner but since the video was shot I have worn both for 30 minute or hour intervals switching for at least 12 hours just to get a feel for both anoraks side-by-side. In winds over 5 mph the Boreal Mountain Anorak wins every time as it acts as a decent wind barrier on its own (if I wear a decent base layer instead of my normal t-shirt I don't even notice the wind if my back is to it, but the actual garment feels cold to the touch and where it touches the skin you begin to cool off) but under 5 mph winds the Lester River seems to be a little warmer as it keeps more air heated by my body sealed into the jacket. The interesting thing is the what happens when the wind dies down- The Lester River Bushcraft Anorak feels about the same as it did prior to the wind blowing through where as the Boreal Mountain Anorak stays cold for around 10-15 minutes while your body warms the jacket back up. Now if you layered correctly that won't matter and the Boreal Mountain Anorak would win hands down as it breaks the wind better, but for those of you who like to just wear a t-shirt underneath you might be a tad cold for awhile until your body heat rewarms the garment.
Overall Quality: This is one good looking piece of clothing! The strips, color and beads really give this anorak something extra. The color in particular I like a great deal as it seems to match just about anything where as the solid OD green doesn't as much (not that I really match when I'm in the woods, but that might matter to some). Upon initial inspection all of the seams were well sewn (not that I'm an expert), the garment was in excellent shape and it appears to be field ready out of the box. The softness of the wool is notably high which will make a more comfortable nights sleep and the accent beads are a very nice touch.
What Would I Change: 1) If I'm putting beads on something it would probably be pace count beads so I would probably try to make the beads at the chest pace count beads; 2) Some kind of sleeve adjustment to help keep your cuff in place and seal in warm air; 3) Extend the sleeve a few inches to allow you to tuck your arms in whenever your sleeping without a sleep system; and 4) Pocket added- this is my fault as I didn't realize it was an option until after I got the garment in the mail- the bad thing is this anorak is so nice looking I hate to order one to sew on as I'm sure I wouldn't do it justice.
Lester River Wool Anorak:
Feel: This anorak is the most irritating to the skin so if you have issues with wool products then you will itch with this one. With that said...... I have spent many nights using just this and a ground pad or a pine tree as my sleep system and when your tired the itching stops for me. You can see the loose fibers that you expect with military surplus style blankets on this anorak, so it isn't the smooth soft feel you would get with the Boreal Mountain Anorak.
Functionality: This is the most functional anorak in the group in my opinion. Everything about this piece of gear has been engineered to meet a particular need of someone who spends a lot of time in the woods and is a heavy user. I will cover a good bit of this in the extras category but it seals in heat well, has plenty of gear organization and is a bomb proof shelter option for light rain, snow or sun but doesn't do its best work on cold windy days (either have a wind break layer under it or throw a canvas anorak over it.
Weave & Stitching: As you can see in the video this was the second thickest weave, although it is close to the Woolrich weave. The stitching is hands down the most bombproof of the anoraks evaluated in this review! In the video I compare the amount of stitches per seam and there are almost 3x the amount of stitch per seam on the Lester River as opposed to any other anorak. While the single line of stitching on the DIY anorak has held up to continual used by Jeremy over the last year so this might not be of great significance, but a failure would be very detrimental if utilizing this as your exclusive shelter option in a survival situation.
Cost: $267.00 USD inclusive of shipping. Before you say no coat is worth that much money.... I have to differ on that opinion. This anorak has been my home on several spring and fall hunting and fishing trips where I didn't feel a shelter was necessary. I merely would throw up a quick wind break for the prevailing wind, pile pine needles or debris at the base of a pine tree lean against said tree, tighten down everything on the coat and go to sleep. That level of confidence in your anorak is where the money spent becomes worth it in my mind.
Extras: The front pocket is perfectly engineered for every last bit of gear I would carry in my pockets and might need rapid access to: bear gun, flashlight, headlamp, fire tin, car keys, lighter and gloves all have a nice little place they call home leaving room for tinder material as I go or a birds nest that I need to dry out or keep dry. The interior loop to hang the anorak in the field is also a great plus as you can use that to hang the rack instead of a limb which could potentially damage the hood. It also allows the anorak to be used as a makeshift door for a shelter or hung on a ridge line and used as a quasi wind break.
Warmth: I have no complaints with this anorak as it has seen me down to -22 F with good layering underneath. I will say that wind does cut through this anorak more than the Boreal Mountain Anorak as I explained above; however, this anorak warms back up faster after the wind dies down.
Overall Quality: It's really hard to beat bombproof and this anorak is bombproof. I have lit hundreds of fires, caught critters/fish, camped, lounged and worked in this anorak for over a year now and I couldn't be more pleased with the quality of craftsmanship, durability and design.
What Would I Change: I would try to make this anorak a little softer if possible for those who have issues with the itching feeling that comes with this type of wool. I also might try to solve the issue of everything bunching up when sitting, this isn't a problem in the woods but presents problems for long rides in the car or wearing around town. The design is perfect so there really isn't much to change in my mind.
DIY Anorak:
Feel: This anorak is middle of the road on feel between Lester River and Boreal Mountain as it was made from a cheap harbor freight wool blanket. It is much thinner and lighter than both of the aforementioned anoraks as well.
Functionality: This anorak has served Jeremy well since we made it last year and got him through spring gobbler season, the entire fall hunting/trapping season and a snow storm we worked through where we got nearly 3' of snow in 24 hours at the onset of our 56 hours at work that weekend. It doesn't have any bells and whistles, but its down and dirty and it serves it purpose!
Weave & Stitching: This anorak had the thinnest weave of all the anoraks tested and it is obvious when you hold them in your hands or wear them, its just a much lighter weight wool. That said, it hasn't failed with heavy use, but you have to layer well when using this anorak. This is the only hand stitched anorak evaluated and thus has much wider stitching. That said, it hasn't failed or even started to unravel.
Overall Quality: This one is what it is, two guys made it in between calls at work out of a cheap wool blanket (find out how to make one here- LINK) and stitched it 100% by hand. It isn't pretty by any means and there are 0 frills. If you have extensive sewing skills, plenty of time and high quality materials then I'm sure you could make a product which rivals its commercial equivalents.
Cost: CHEAP! We did this project as a poor man's alternative to an anorak and that's exactly what it is. You can have one of these for well under $50.00 USD or you can spend $200 for a top of the line blanket.
Extras:The side slits were added after the first outing to give freer range of motion and accommodate you when sitting. It does have a front pocket, but I honestly consider that a necessity as you're giving up access to your other pockets unless you prefer a bushcraft belt.
Warmth: It comes in last as it is the thinnest and the loosest weave by far. Even the Woolrich sweater is warmer than this anorak. Obviously, you can make these anorak much warmer, but at an increased cost.
What Would I Change: I would essentially make it as heavy and soft as the Boreal Mountain anorak with the pockets and closures of the Lester River Bushcraft Anorak.
Boreal Mountain Canvas Anorak:
Feel: This anorak is meant to be the wind proof layer in a winter system and thus is fairly thin and smooth canvas feel. Wearing it with just a t-shirt underneath created no issues against bear skin.
Functionality: It's job is to keep the wind out and the heat your body emits in.... and it does that at a level of efficiency that would rival the best of the best in any industry. This thing is a body heat trapping machine! I would love a front pocket, but once again that was my fault for not realizing it was an option when it was ordered so you can't ding that as it is something you can add.
Weave & Stitching: Very Tight... So tight in fact I would say it is wind proof :). Canvas is supposed to be quasi breathable as well, but I haven't worn it enough yet to evaluate that aspect of the anorak. The stitching is all double stitched and of the same workmanship as the wool anorak. There are a lot more stitches per square inch than on the DIY anorak so failure in the sewing shouldn't be an issue (Once again I haven't done a long term field test that will come at the end of the spring I believe).
Overall Quality: HIGH! This anorak is well put together and if you're in the US our dollar will go a long way with this Canadian Company who is very easy to work with and stand behind their products!
Cost: At rough cost $180.00 USD (the USD is declining vs the Canadian Dollar as it was $163 whenever I shot the video last week) depending on exchange rates (costs $250.00 Canadian Dollars) this canvas anorak is one of the most affordable on the market today. The only alternatives I could find cheaper were military surplus which changes the design and function considerably. You can make your own if you have access to canvas locally (look up Jamie from Self Reliance Outfitters video on constructing one from last week); however, I can't find the right size and weight locally or online to provide a decent price comparison here.
Extras: This anorak comes with decorative beads on the hood and neck area much like its wool counterpart.The rapid availability of the product is also a large plus if you need an anorak for an outing ASAP as you simply can't get many of the other anoraks for months (if you need one now you might get it by next winter at some of the other companies).
Warmth: This anorak does it's job and does it well. I wore this anorak with just a t-shirt in 20 F for over an hour comfortably and attempted to wear it with each anorak as a base layer in the teens but felt like I was cast into the depths of Hades! For someone who likes it cold like myself, this is a one season anorak and for those cold winter days where the wind is kicking up. I honestly cant wait until it gets down well below 0F again to test this out with a ground pad and wool anorak as my sleep system.
What Would I Change: I would make the same potential changes to this anorak as I would the wool anorak: 1) If I'm putting beads on something it would probably be pace count beads so I would probably try to make the beads at the chest pace count beads; 2) Some kind of sleeve adjustment to help keep your cuff in place and seal in warm air; and 3) Pocket added- this is my fault as I didn't realize it was an option until after I got the garment in the mail- the bad thing is this anorak is so nice looking I hate to order one to sew on as I'm sure I wouldn't do it justice.
Conclusions:
While this is an initial review for the Boreal Mountain Anoraks and a year follow up to the Lester River Bushcraft and DIY anoraks I was able to learn a lot about these four anoraks testing them with various layers in just one week and about 16 hours worth of time outside. I tried not to let past experience or my love for various items cloud my judgment and basically tested everything with a fresh set of eyes. Jeremy helped with the testing so we would each wear a configuration for 30 minutes or an hour and basically switch off configurations to see how they did apples to apples. He fell in love with the Boreal Mountain Wool Anorak the second he put it on due to the fact it was softer and provided a little more protection from the wind. I was more in favor of the Lester river Bushcraft Anorak as I have been using it non-stop for the last year and it has seen me through some cold nights. At the end of the testing of those two specifically we found that the Lester River performed better (i.e. kept you warmer) when there was no wind or less than 5 MPH winds and I believe this was due to the fact that you can really cinch that anorak down and seal in all of your body heat. We also found that above 5 MPH the Boreal Mountain Wool anorak performed much better than the Lester River Anorak due to the wind breaking capabilities. The interesting thing is when wearing a t-shirt under the both you would get back to warm faster in the Lester River anorak once the wind settled down as your body heat warmed the anorak faster and it seemed to take longer for the Boreal Mountain Anorak to warm back up after the wind stopped (i.e. the garment still felt cold on you for awhile after the wind stopped blowing). Now all of that doesn't matter if you're wearing a wool sweater under the anorak or a good base layer as the garment wouldn't be touching your skin and you would still be toasty warm in the Boreal Mountain anorak.
When it came to testing the Boreal Mountain Canvas Anorak we had smaller time frames in which we could actually keep it on as it was in the low 20's when I was with Jeremy and low teens when testing it on my own. The canvas anorak fells better with the Boreal Mountain Anorak as they were essentially designed to be mated. Jeremy noted that the Lester River Anorak bunched up a little bit in the canvas anorak but i didn't find that to be the case personally. We were split on which two we thought worked the best together. Jeremy thought pairing both the Boreal Mountain anoraks together provided the best result; whereas, I thought the Lester River with the Boreal Mountain canvas anorak worked best. Jeremy reached his conclusion because he thought the two were more comfortable and warmer together. I reached my decision because of the dynamic of mixing the advantages of a more breathable wool anorak for more temperate times with a very warm canvas anorak for windy cold days. If I was going some place arctic I would probably go with all three. I didn't dear try all three at once but Jeremy did a few times and was at near stroke temperature in the garage which was around 60F. The three actually work quite well layering fit wise but for those who like it cold like I do you are going to have a hard time finding a day that is cold enough for all three. If you are making a go at the Iditarod all three might be for you!
Honestly, choosing between these two wool anoraks is a highly personal decision and really depends in what you're looking for in your anorak. It is my hope that this initial review helped demonstrate the difference in the two anoraks for those who may be on the fence. I personally would buy either with confidence as they will both serve you well for years to come!
Have something outdoor/bushcraft/trapping/preparedness/hiking/camping/fishing/hunting related you want me to make a post about? Leave me a comment and I will see what I can do! As always feel free to leave your questions and comment below! Also if you enjoy the blog please vote for us on the following websites to help us reach a wider audience:
For Christmas this year my wife gave me the Phase 1 and Phase 2 correspondence courses through the Pathfinder School and wouldn't you know it the first module and first deliverable for the course was to put together a 10 C's Kit and provide three uses for the items in your kit. While I didn't have all of my normal kit items with me this past weekend when I made this course kit up, it will work well for the purposes of these courses. In addition to three uses for each kit item you were to provide an historical account of woodland kits (think Nessmuk and Sears) and compare them to the 10 C's kit that you selected. Throughout this article I will detail the kit, reasons for selecting what I selected (aside from the fact it was in my car), three+ uses for each kit item and the historical significance of the kit. The video below (click the image to start the video) details the contents of the haversack 10 C's kit as well as three uses for each item.
Need A Few Items For Your 10 C's Kit: Try These-
So Let's Talk About Historical Kits:
Otzi The Iceman (Lived somewhere between 3350 BC and 3100 BC):
So this is one of the oldest complete kits of record thanks to Otzi being found frozen in the Italian Alps. His roughly 5'5" 100lbs mummified remains were found along with several kit items in 1991 and have been studied by scientists the world over ever since. The kit included the following items: Axe, neck knife, pressure flaker (for flint napping), Bow, quiver of arrows, flint, chaga, horseshoe fungas, mushrooms, berries, birch bark containers, backpack, net, first aid kit (wild medicinal), belt and various leather and hide based clothing. So what can we learn from this kit? 1) Natural materials work well for clothing (leather and hides work well in various types of weather and the best shelter element is the clothing on your back!). So how do I employ this lesson in my kit- WOOL; 2) Neck knives are not useless- you don't have to have a survival knife 100% of the time (See what I look for in a Survival Knife HERE) as long as you have a heavy-duty cutting option available but it helps.. So lessons learned I like neck knives so I'm going to carry one, but I also like larger knives for heavy-duty tasks so I will carry one as well after all 2 is 1 and 1 is none; 3) Fire is King- While he didn't carry a lighter or any modern means of fire (because they didn't exist) he still had multiple means of carrying fire within his kit. 4) Good quality gear is a must- having an all copper axe in that time period where metal smiting was at a minimum this item would have been a status symbol and very hard to come by for the woodsman of his day- lesson learned buy quality gear especially those in the 5 C's; 5) A command of wild edibles, medicinals and a wide variety of uses for all things in nature is a must for any outdoorsman! Lesson learned- knowledge is power and the more you carry in your mind the less you have to carry with you. 6) Multiple means of obtaining meat is needed: in his kit you will find not only a bow but also a net for small game or fish- lesson learned you need to be able to eat and for long term self-reliance as I say regularly trapping is where its at!; 7) Containers are king- weather they be natural or man-made. Granted water borne pathogens were nowhere near as bad as they are today and their immune systems were more accustom to those pathogens so boiling was not needed as much as it is today. 8) Maybe a Roycraft pack isn't actually a Roycraft pack as his pack looks a whole lot like that model- lesson learned a means of conveyance is key and if you lose one they certainly are not hard to make.
18th Century Woodsman:
So what about all those trappers and hunters living the pioneer life in the early days of the US? What was in the kit of the ultimate survivalist of the time (granted primitive cultures were probably a step above them): Blanket Roll, tarp, black powder gun, shooting pouch, powder horn, jute twine possibly tarred twine, belt knife, hatchet or axe head, fire kit, canteen, food, means of cooking/boiling, compass and a fishing kit (see my 18th Century kit here- LINK). So what can we take from this kit to lend to out 10 C's haversack kit? 1) Cover, Cutting tool, Combustion, Container, Cotton, Candle, Compass, Canvass Sail Needle and Cordage- There are 9 of the 10 C's in this kit, add in pine pitch and you have cargo tape of the day thus where the concept of the 10 C's was born.
Golden Age of Camping- George W. Sears/Nessmuk:
This was the original outdoor journalist! He was a sport writer for Forest & Stream Magazine and was a founder of the camping age and wrote under the pen name Nessmuk (a name which many blades bear the name to this day). So what did Nessmuk have in his kit? Haversack, cordage, sewing kit, file, first aid kit, fire kit, compass, cotton, trapping kit, wool clothing, wool sleeping bag, tarp, cook kit, hatchet, belt knife, folding/jack knife, fishing/hunting gear, food and an axe. So what did we learn from this kit? For me it was that Dave took most of his 10 C's of survival elements from a mix of this kit and the 18th century woodsman as nearly all of the 10 C's were represented in this kit.
So what are our overall takeaways from these three historical kits?
Each kit carried the 5 C's at a minimum, most of which had at least a spare of those 5 items with the exception of the ice man. The 18th Century Woodsman and Nessmuk both carried some form of the 10 C's (you have to use your imagination a bit on the cargo tape aspect) with redundancies of the 5 C's. Essentially, taking an historical approach to a self reliance kit you would find yourself with the 10 C's, good clothing, a firearm and at least one other means of getting meat (trapping, nets, etc.). So why are the five C's carried in each of these historical kit, lets look at them one by one: 1) Cutting tool- This is without a doubt the most difficult and most used kit item to replicate in nature. With a solid cutting tool (preferably two) you can essential make all of your other survival needs.; 2) Combustion- even the ice man had a huge fire kit as back then fire truly was life and it makes everything else your want to do out in the woods much easier to accomplish all while keeping predators at bay; 3) Container- with the advent of metal containers we are now able to easily boil water, cook or make medicine in our container but even the ice man had two containers with him (one probably was to carry an ember for his next fire); 4) Cover- Each had some form of shelter element, while the iceman was no where near as sophisticated he still work skins and hides which as I always say the best cover is the kind you wear; and 5) Cordage- While the more recent outdoorsmen had access to much better cordage the iceman even knew the value of cordage as he used various types in his kit including natural materials and pieces of leather hide. 6) Mean of food procurement- weather it be a bow/arrow, flint lock rifle, nets or traps finding food is always at the top of the mind and in my opinion an 11 C needs added! I think I will dub it "Critter Getter"!
Need A Few Items For Your 10 C's Kit: Try These-
So Whats In My Haversack Kit and Why?
This kit includes the following items and I will list them in order of importance to me personally:
Cutting Tools: Lt. Wright Bushcrafter, Battle Horse Knives Frontier First, Jeff White Spear Point, Bacho Laplander, Striker Knife in Micro 10 C's Kit. So why are cutting tools without a doubt the most important item in my kit? Well if I have a sharp high quality knife and a good baseline skill set I can make most of the other items in my kit if need be and over time can make a very comfortable camp. I always go cutting tool heavy as never enter the woods without a neck knife, belt knife and a Bacho Laplander (buck saw and axe for long-term trips or winter trips with minimal shelter)
Uses: Slicing, modified hammer, batoning wood, modified drill, processing game, cutting wood, carving spoons/bowls, making fire (flint/steel), signaling, etc.
Combustion: Flint/steel, magnification, Bic Lighter, 1/2" x5" Ferro Rod, Fire Pad Tinder, Tinder Quick, Char Cloth, Fat Wood, Gorilla Tape and Magnesium make up the main fire making kit within this kit. I you have ever fallen through ice and then tried to make a fire.... let alone flint/steel or a bow drill fire then you may not understand this ranking especially since I camp without a fire 90% of the time (except for cooking purposes). When you need fire, well you need fire and usually in a hurry. Can I cut back on redundancy here? Of course I could go down to my neck knife and be fine, but different evolutions call for different skills demonstrations.
Uses: Making fire (can be used for- making medicine, making charred material, preparing food, signal, maintaining core temperature, hardening spears, etc.) and self defense tool.
Cover:Clothing (Lester river Bushcraft Boreal Jacket, Scent Lock fleece/wool pants, wool mid layer, wicking heat gear base layer), grabber reflective tarp, SOL 2 person blanket/tarp, two 55 gallon trash bags, two clear trash bags, four prussicks, four tent pegs and one bungee cord. Granted I like the temperature a little colder than most and like minimal cover elements (although I have to admit I'm falling in love with hammock camping) but I would be remissed if I didn't include my clothing in this section and the Lester River Boreal Jacket is a formidable piece of gear and I have done a three day trip with it as my only shelter several times. So like I always say, dress for the worst weather and not for the best weather.
Container: Pathfinder 32 oz bottle, Pathfinder nesting cup, Pathfinder Stove, Altoids tin x2, Candle tin and Aluminum foil x2. I lack Birch where I camp and practice my skills so making a birch container is simply not in the cards for me. While I could burn out a container, find and use an old glass bottle or beer car or even carve out a bowl these items are less than ideal.
Uses: A good stainless steel bottle allows me to make water drinkable, prepare food, make medicine, control core temperature, extend my range of travel, a make shift weapon or hammer and much more.
Cordage: Jute Twine ( 50'), #36 Bankline (150'), #12 Bankline (25'), Paracord (50'), Shock Cord (5') and a Bungee Cord. I may throw around 50' of paracord into the kit eventually to make a few of the tasks easier but generally don't carry much paracord other than show laces, survival bracelets and lanyards.
Uses: flash tinder, make charred material, shelter making, lashing, gear repair, and much more.
Cotton: shemaghs x2, Cotton Bandanna x3 (2 not pictured), Small squares x 15 (fire kit), 10"X10" rag (Micro 10 C's Kit). I may remove one of the shemaghs since I added two bandannas (work better for filtering in a tripod filter).
Uses: char cloth, cleaning up camp, cleaning gun, muzzle loader patches, sanitation, making medicine, purification of water, much more.
Candle: 10 Hour Bees Wax Candle, Headlamp, weapon light on CCW and pocket light.
Uses: sealing items, heating a shelter, providing light at night, singling and much more.
Uses: First Aid (splinter removal or sewing wound), gear repair, making primitive containers, boring a hole in place of a drill.
Cargo Tape: 15' Gorilla Tape (wrapped around business card lose), 10' Gorilla Tape (Micro 10 C's Kit), 5' Gorilla tape assorted throughout kit to attach items.
Uses: cordage, container, flame extender, tinder bundle, gear repair, water proofing, sealing clothing, shelter, and 1000's of other uses (see myth busters 2 part show, they even made a function canoe out of the stuff!).
Compass: Suunto Compass with adjustable declination, scale, mirror and whistle.
Uses: Navigation with or without a map, first aid (mirror), signal (mirror or whistle), fire starting, etc.
Critter Getter: 410/45LC double barrel pistol will take up residence within this kit along with a few spare rounds of ammunition, 45LPC defensive carry pistol with 21 rounds, 410-22lr adapter, 15' snare wire.Honestly I would rank this above some of the 5 C's in many situations as I don't like to be caught anywhere without a firearm, but that's just me (and well every historical woodsman carried some type of weapon with them into the woods).
Uses: GETTING CRITTERS, self defense, fire starting (flint lock rifles were often used to start fires), extract powder for first aid, signal for rescue and even a hammer on occasion.
So How Does It Look All Wrapped up?
The items at the top are all in the main body of the haversack while the others are in the flap pouch to add weight and provide easy access to the items I use the most. The weight is pretty manageable and easy to carry for any length trip and the elements of the kit can easily be incorporated into a larger kit as needed. The shelter kit, shemagh wrap and haversack can sit on top of my Frost River pack while the lose items and water bottle will sit perfectly in the exterior pockets.
Conclusions:
While this kit isn't anything new for me as I carry a variant of this kit on a regular basis, but was designed around the deliverables required for the phase 1 and phase 2 Pathfinder School courses. I decided to go with the haversack as its comfortable, but might just add this to my EDC bag for the duration of the classes so I can do whatever is needed whenever I have a spare second. Overall I look forward to going beyond the first module and taking each of you along for the ride. I will do a separate review of the materials once I dig through them, so be looking for that in the near future.
Have
something
outdoor/bushcraft/trapping/preparedness/hiking/camping/fishing/hunting
related you want me to make a post about? Leave me a comment and I will
see what I can do! As always feel free to leave your questions and
comment below! Also if you enjoy the blog please vote for us on the
following websites to help us reach a wider audience:
This week's survival skills challenge is as simple or as difficult as you would like it to be. The premise is to gather whatever survival/self reliance gear you have into a kit, if you have a BOB, GO Bag, Hunting Pack, EDC Bag (See mine HERE- LINK), etc. even better, and take that kit out into the woods for a 24 hour trip. The kit can be as big or small as you would like. If you would like to take the challenge to an extreme you can just take a your EDC (highly recommend you have a survival bracelet and and a fixed blade knife- See my series doing this same challenge HERE- LINK) at a minimum or if you have a micro kit (See My Micro 10 C's Kit Here- LINK) this would be an excellent opportunity to test out how well it will help you in a wilderness environment. The purpose of the challenge is to test not only the gear in your kit to determine its effectiveness and potential issues but also to test out a few skills while you are out to determine where you may need to focus your future practice. Check out the video Below as I go into a little more detail about the challenge and what I hope you get from it.
This challenge is one I take on weekly, as I like to consistently test and retest my gear to determine it's effectiveness for long-term self reliance. I hope you are able to find what the gaps in your supplies may be for summer (we will do one of these at least each season) and what skills you can stand to work on. My favorite spring/summer skills to practice while out are fishing, wild edible collection and as always fire craft so feel free to work on those skills.
Have something
outdoor/bushcraft/trapping/preparedness/hiking/camping/fishing/hunting related
you want me to make a post about? Leave me a comment and I will see what I can
do! As always feel free to leave your questions and comment below! Also if you
enjoy the blog please vote for us on the following websites to help us reach a
wider audience: